
This week I completed a project that was years in the making. Since I was a baby, the same small dresser has followed me around wherever I go. It was in my bedroom growing up, my apartment in college, the apartments we lived in when newly married, my first house and now in our current home. Fifty-six years of housing my belongings.
Since living in a house, the dresser has been located in the master closet. I open the drawers every morning to grab out my underwear and socks for the day. The bottom drawer holds treasured letters from friends and old jewelry.
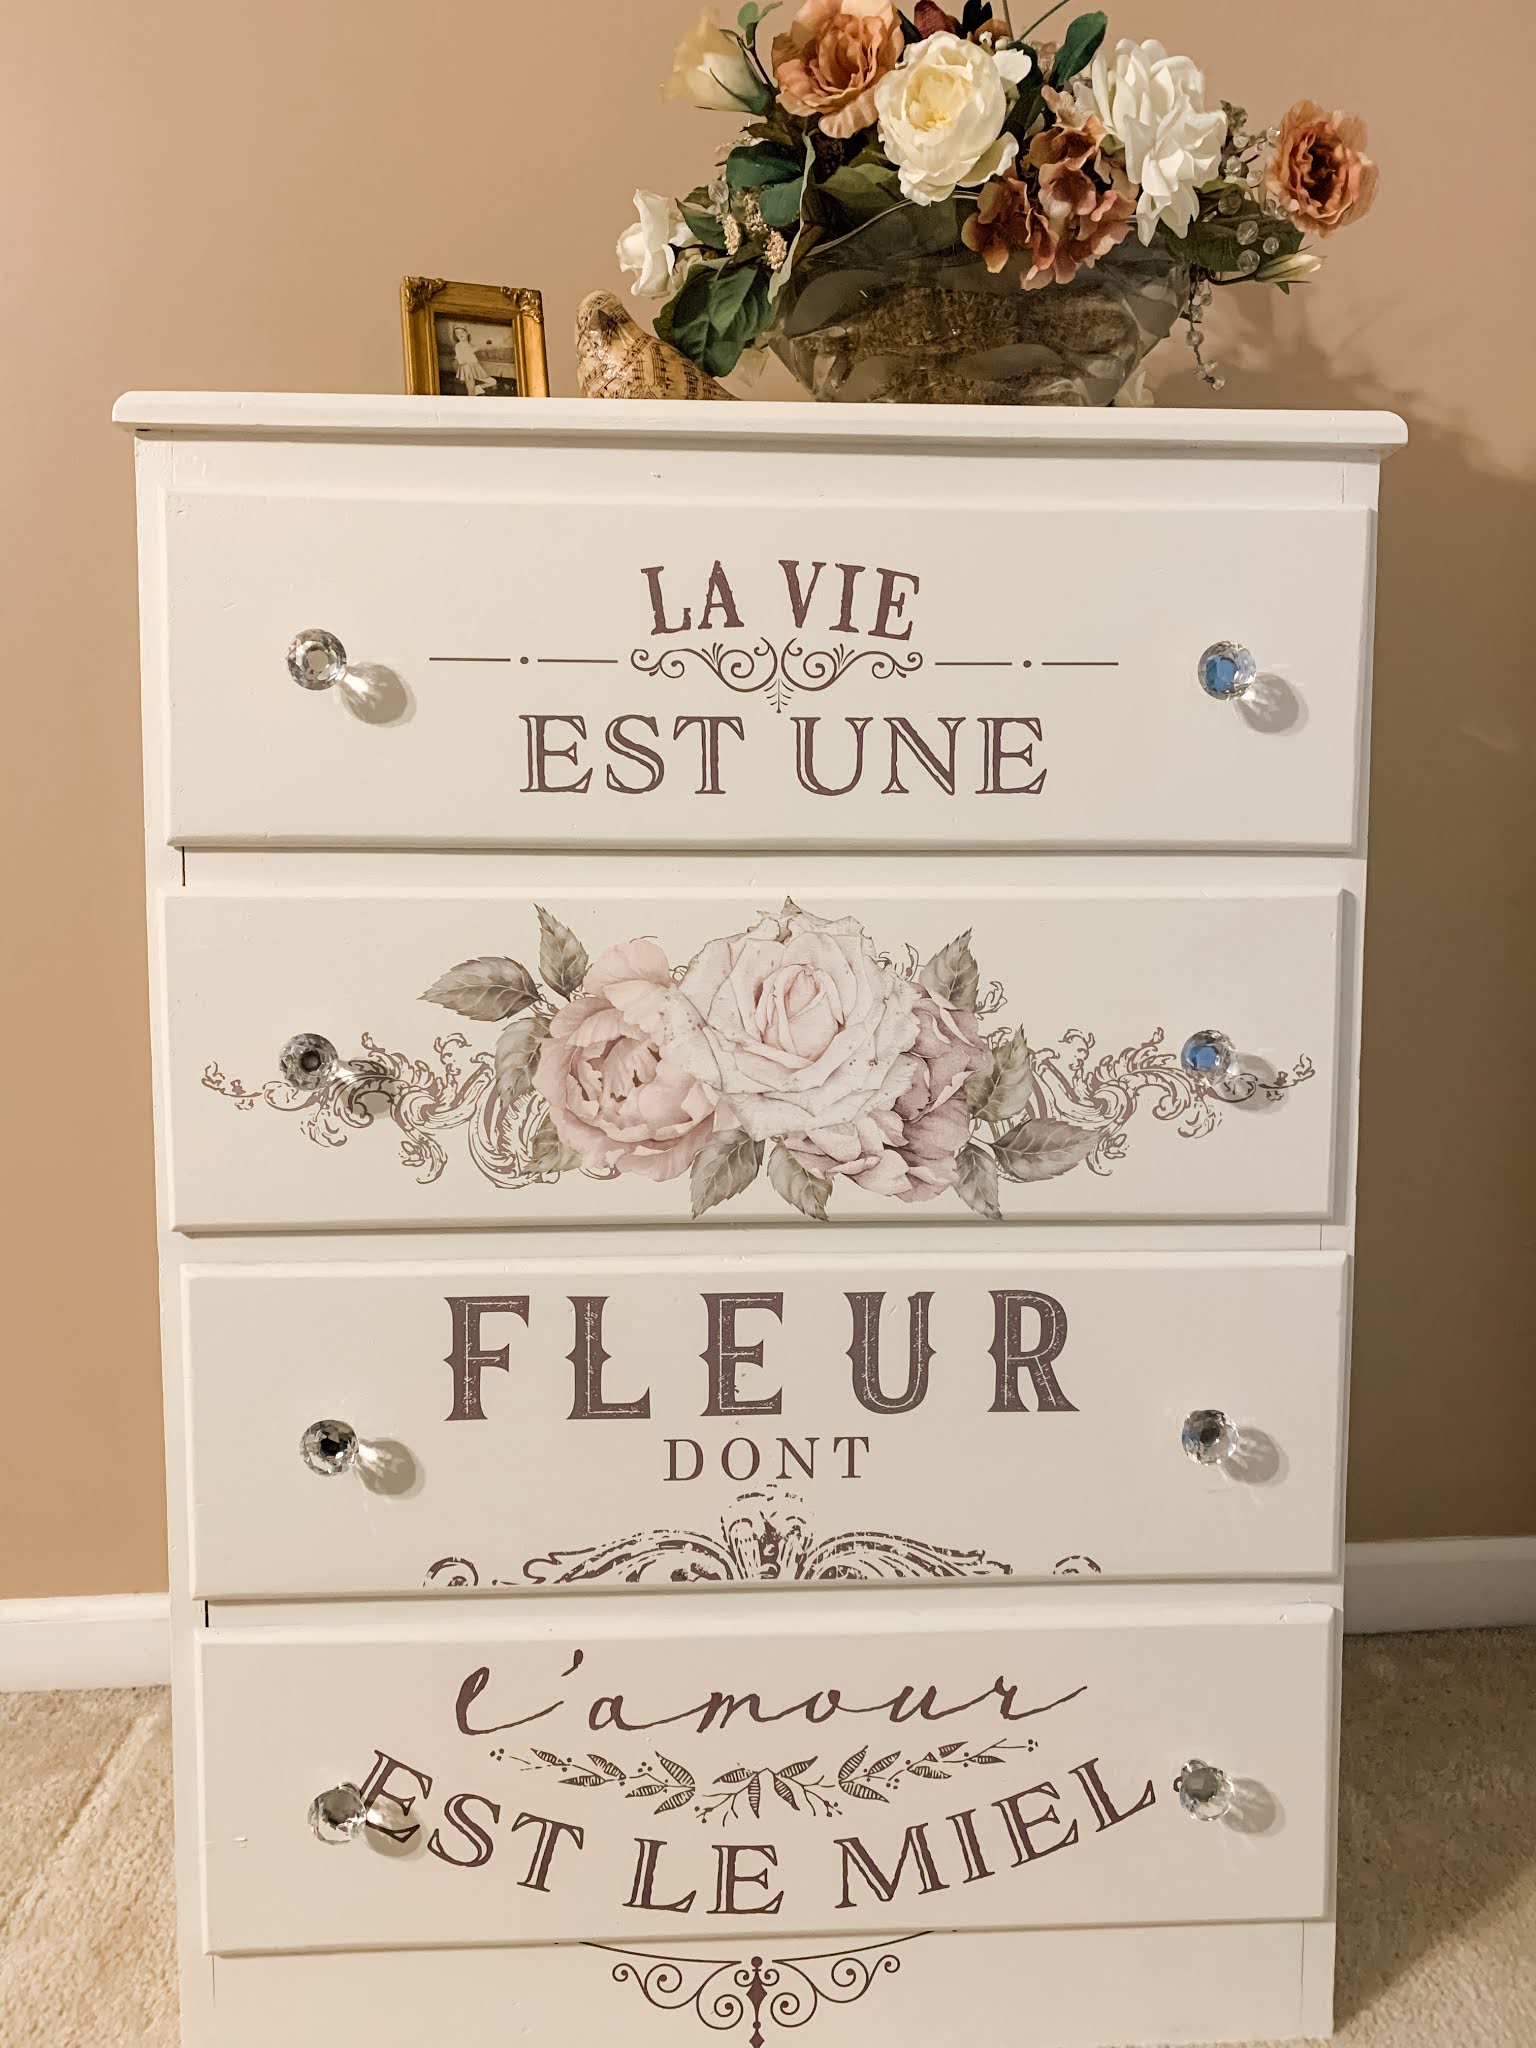
For years I've wanted to paint it, but the project never bubbled to the top of my to-do list. When I started working on our closet a few weeks ago, that changed. And this is how the project turned out ~

One of the things that always deterred me from starting the dresser redo was I thought I'd have to strip the varnish off the wood or, at a minimum, sand the whole thing. I started reading about Heirloom Traditions All-In-One Paint that promised no stripping or sanding. Sounded like I no longer had an excuse! The paint was ordered and the project began!

Before starting any good project, I always fall down the rabbit hole of checking out every similar project on Pinterest. Just painting the dresser was not going to be enough to make me happy! After a lot of searching on Amazon, I ordered a rub-on for the front, new pulls, and liners for the drawers.
The Heirloom Traditions paint was a winner! I washed the dresser down with soap and water, then applied the paint with a foam roller. It went on smooth and easy. Three coats were applied. For this dresser, I ordered a pint and used about two-thirds of the can. Heirlooms Traditions has discount codes everywhere, so do a quick Google search to get their current code. They also have several application YouTube videos. Bottom line: the painting was a breeze.

Next came the rub-on. After letting the paint cure for 48 hours, I cut the rub-on into the sections needed for the drawers and held them in place with painter's tape. The rub-on came with the tool needed for the application. This was so, so easy! I had done rub-ons before on walls, but this was so nice because I wasn't applying it over my head.

The words are from Victor Hugo and mean "Life is a flower in which love is the honey". True that!

Next came the new drawer pulls. I'd had my eye on these crystal ones for quite a while and had been trying to figure out where I could use them.

Next came the outside of the drawers. For this, I used wrapping paper. I cut the wrapping paper a bit larger than the size of the drawer, sprayed adhesive on the paper, and attached it. I used a brayer to rub out all the bubbles. Then used an Exacto knife to cut off the excess paper. This little extra touch is going to make me smile every time I open the drawers.


Drawer liners have long been one of my favorite things. The drawers are now neatly lined with fresh linen scented beauties!

To finish off the drawers, I added dividers. These help keep my items neatly in place and makes it so easy to find what you're looking for. My tights are separated from my pantyhose, my underwear from my camis.

Overall, I love the way it turned out! As a matter of fact, I'm kind of sad it's going back in the closet for no one to see but me. But it will give me a sense of accomplishment every time I look at it!
Cute, nice work!
ReplyDeleteThat is a beautiful work of art now! I just love it!!
ReplyDeleteOh my gosh Penny! That turned out absolutely gorgeous! Pinned!
ReplyDeleteYou did a great job with the dresser makeover. I love it!
ReplyDeleteThis is amazing - absolutely beautiful!!!
ReplyDelete